It is our great pleasure to share one of our loyal customer's tried and true pumpkin pie recipes! Heather bought a Luxury Pie Pumpkin from us last week and was blown away by its sweetness and texture. She loved it so much she wanted all of you to be able to experience the joy of locally grown pumpkin pie for yourselves this Thanksgiving. Thank you Heather!
Every year I buy 1 or 2 pie pumpkins, bake them and purée them. I use the purée fresh for Thanksgiving and Christmas pies, and freeze the rest for muffins and things later. One medium-sized pumpkin, like the ones you are selling right now, will yield about 3-½ C pumpkin, enough for 1-2 pies. Pumpkin purée freezes GREAT. It lasts in my freezer to up to a year with almost no degradation of taste.
My favorite recipe has always been the one from Joy of Cooking(mine is the 1977 version). It’s attached. I spent extra time explaining how I do pie crusts (because they are not nearly as hard as people think, especially my way!).
Author:
Heather Henderson
Ingredients
1 medium sized luxury pie pumpkin
For the Crust
1 Cup white flour
1/3 cup butter
1/4 tsp salt
1/2 tsp sugar
For the Filling
2 1/2 cups pumpkin Puree
1 1/2 cups half and half
1/4 cup brown sugar
1/4 cup white sugar (I would use more normally but the Luxury Pie Pumpkin Puree is so sweet!)
1/2 tsp salt
1 tsp cinnamon
1/4 tsp freshly grated nutmeg
1/4 tsp all spice
1/8 tsp ground cloves
3 eggs, lightly beaten
Directions
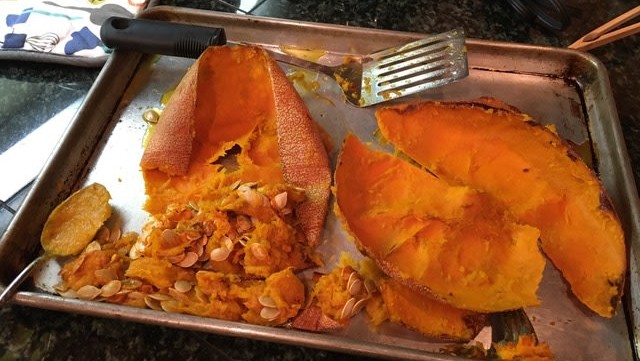
To Make the Puree
Baking it is very easy: lightly oil a baking sheet with sunflower oil, canola, any neutral oil. Preheat oven to 325°. Cut the pumpkin horizontally into halves, and lay each half, cut side down, onto the baking sheet. Put in the oven and bake for about 45 minutes. Check it then — the stem should sink down easily when pushed, you can just tell when it’s quite soft by sticking a fork into it.
Take pumpkin out and let cool slightly. Turn each half over, and gently scoop the seeds and stringiest part from the center of each. Scoop out the rest of the flesh and purée it in a Cuisinart (my preferred way) or blender. It can be hand-mashed, but processing it makes it really smooth.
For The Crust
Work together the butter, salt, sugar and flour until the mixture is lightly combined and the butter creates lumps about the size of small peas or even smaller. This can be done by rubbing it together with your fingers, using a pastry blender or pulsing 6 or 8 times in a food processor.
Put the mixture into a bowl and add about 2-4 Tbsp of cold water, a tablespoon at a time, tossing with a fork. Add water until a handful will hold together when lightly squeezed. Get it well moistened, don't worry about it being super flaky or dry. Baking at a high temperature will dry it out and make it flaky all on its own.
Lightly flour a pie pan sized circle on a clean work surface. Form the dough gently into a ball and lay on the rolling surface. Flatten it gently. Sprinkle with flour. Roll out with a rolling pin, sprinkling it with flour whenever it starts to stick, folding it over once or twice to keep both sides lightly floured. When it is a few inches larger in diameter than your pie pan, gently fold it in half and transfer it into the pan, unfolding to line the pan. Go all around the perimeter of the pan, flooding the pastry that hangs over into a kind of vertical ridge on the edges of the pan. Use your finger to press down the ridge in scallops.
Preheat oven to 425 F
Combine all of the filling ingredients in a large bowl and mix well with a whisk. Pour it into the prepared pie curst and bake at 425F for 15 minutes, reduce heat to 350F and bake another 45 minutes until a knife inserted into the center comes out clean.
Let the pie cool for a half or so. You can serve it with plain whipped cream or whip the cream with a little bit of brandy or Cointreau!


Leave a comment